
This is what the room looked like before (below), and no I guess its not a terribly dramatic before and after because the walls are still cracked and peeling, but that floor...
The new one makes all the difference.
Because when you are taking the laundry out and you drop it on the floor, you don't want the floor to be so yucky that the laundry has to go back in again.

Below you get a really good picture of how bad the floor was before: new floor above, and ridiculously bad surface below. Looked kind of like icing going on a cake but far more satisfying (I am not much of a baker).
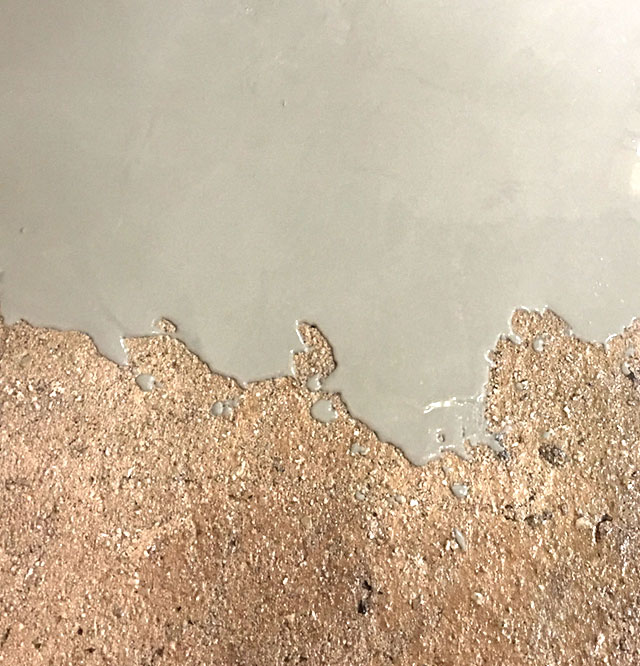


I would also recommend you at least double how much you calculate you need and just have the product on standby, you can always return an unopened tub. I vastly underestimated the volume and an unexpected drive to Bunnings meant part of the floor had partially dried before we got the second tub poured. You can see the line across the floor below and unfortunately it left a small ridge. Luckily not an issue for this project.
There are also areas of the floor that are a little bumpy. I think this is the result of the truly terrible state of the sub floor. It looked far more level than it was. If I had wanted a perfect finish I would have had to lay another layer on top of this one, or used far more product the first time. Again for my purposes it is good enough.


I couldn't resist adding this floor detail with some masking tape and Annie Sloan Chalk paints. I taped up a French stripe inspired pattern and rollered on two coats of Old White. Love love love the way it turned out. I haven't sealed the surface and I am interested to see how it wears.

I finished by painting the ugly pink cabinet door in Annie Sloan Paris Grey (my favourite grey ever). Chalk paint is a fave product of mine because it paints over anything with no priming or sanding required (see this dresser makeover).

Just out of shot I installed a few hanging rails, perfect for hanging a few clothes on hangers. Never had an indoor drying rail and I am a fan, very useful.
Seriously this room has gone from barely usable, to really quite pretty. The walls are still pretty dilapidated, but with that new floor it feels clean and functional for the first time.
No comments
I love all your comments so let me know what you are thinking if you have a moment.